Crystal Pouring Watering Can
Here's a garden feature that is bound to add some sparkle to your yard!
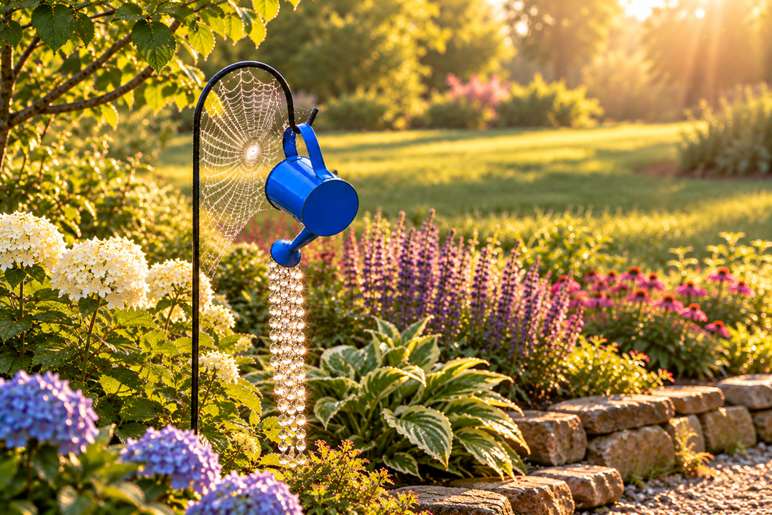
Looking for a beautiful and creative way to add a little sparkle to your garden? This DIY Crystal Watering Can Garden Art Tutorial will show you how to transform an ordinary watering can into a stunning outdoor decoration that looks like it's pouring a shimmering stream of crystal beads!
This whimsical garden art project combines the rustic charm of a traditional watering can with the elegance of sparkling crystals, creating a gorgeous handmade garden sculpture that catches the sunlight and adds a magical touch to your flower beds, patio, or backyard garden.
Using a simple metal or plastic watering can, strands of crystal bead garland, and a few basic craft supplies, you can create your own beaded watering can garden decoration without complicated tools or advanced crafting skills. The cascading crystals create the illusion of flowing water, making this unique piece of DIY garden art especially beautiful when displayed among colorful flowers, lush greenery, and other country garden decorations.
Whether you love making homemade garden ornaments, enjoy creative outdoor DIY projects, or are looking for a thoughtful handmade gift for a gardener, this sparkling watering can craft is a fun and surprisingly easy project to try. It's also a wonderful way to repurpose an old watering can into something beautiful instead of throwing it away!
Follow along with this step-by-step tutorial to make your own crystal pouring watering can and bring a little extra sparkle, whimsy, and personality to your garden.
Supplies You'll Need for Your DIY Crystal Watering Can
You only need a handful of supplies to make this beautiful beaded garden decoration. You may even have some of them in your craft room already!
Metal or plastic watering can — Choose a small decorative watering can with holes in the spout for attaching your crystal strands.
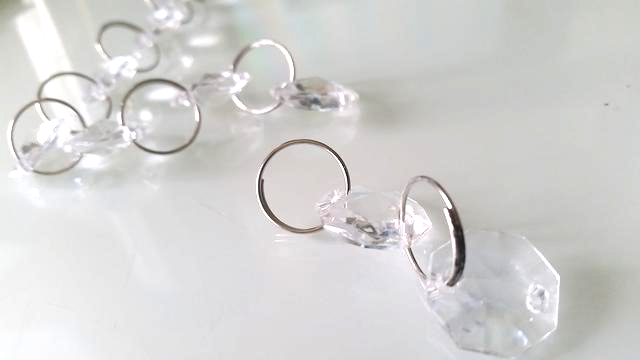
Crystal bead garland or chandelier crystal strands — Clear faceted crystals are especially beautiful because they reflect sunlight and create a sparkling, water-like effect.
Non-tarnish craft wire — I recommend a good-quality, tarnish-resistant copper-core craft wire for attaching the crystals to your watering can.
UV-resistant clear protective spray — A clear coating suitable for your watering can's material can help protect the finish from sun exposure and moisture.
Wire cutters and jewelry pliers — For cutting wire, adjusting crystal strands, and securing your connections.
Shepherd's hook or sturdy garden hanger — To display your finished crystal watering can among your flowers.
Shopping tip: I especially love using faceted crystal garland for this project. The individual crystals catch the sunlight from different angles, creating a gorgeous shimmering effect that looks almost like real droplets of water.
This is such a fun DIY garden art project! I enjoyed making my first crystal watering can so much that I ended up making three — one for myself and two to give as gifts!
What I especially love about this project is how easy it is to make something so beautiful. It doesn't require complicated tools, there's very little mess to clean up, and the finished watering can looks absolutely gorgeous hanging among the flowers.
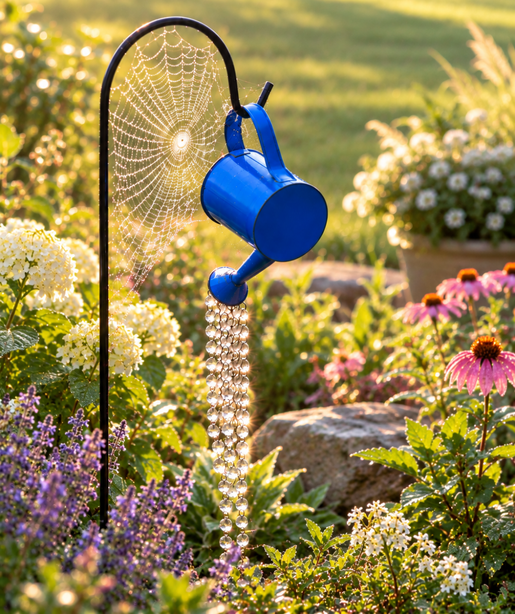
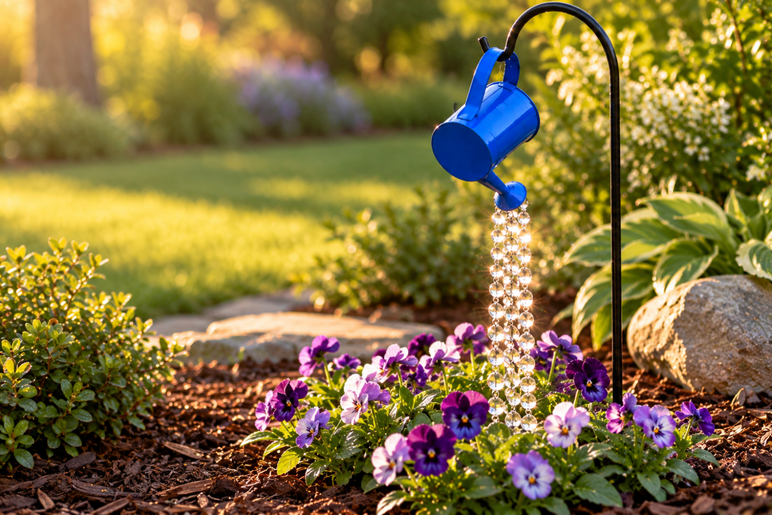
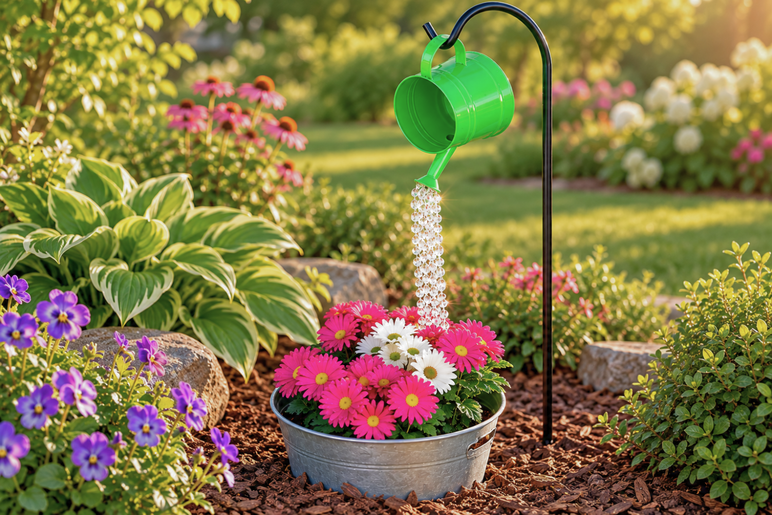
The strands of sparkling crystal beads create the illusion of water pouring from the spout, catching the sunlight and adding a little magic to your garden. It's one of those handmade garden decorations that makes me smile every time I see it!
Whether you're decorating your own backyard, looking for creative ways to repurpose an old watering can, or making a special handmade gift for a gardener, this is a wonderful project to try.

You might
also enjoy...
Disclaimer: Please note that some of the links in this post may be affiliate links or ads. There is no additional cost to you, but The Scrap Room will earn a small commission should you choose to purchase through those links. Click here for my full disclaimer. Thank you for your support.









Step 1: Choose and Prepare Your Watering Can
Start by choosing a watering can for your DIY garden decoration. You can use either metal or plastic, depending on the look you want and where you plan to display it.
I chose a metal watering can for mine because we get some pretty cold winter temperatures, and I was concerned that a plastic watering can might eventually become brittle or crack from exposure to the elements.
If you have an old watering can that you're no longer using, this is also a great opportunity to give it a second life as a piece of upcycled garden art!
Before attaching your crystals, make sure the watering can is clean and completely dry.
For my metal watering cans, I like to use a UV-resistant clear gloss spray. Krylon is one of my preferred brands because I've had good results with its protective finishes.
Choose a clear coating that's compatible with your watering can's surface and intended exposure. Apply it according to the manufacturer's directions in a well-ventilated area, and allow it to dry or cure fully before moving on.
This extra step can help preserve the color and finish of your watering can, especially if you plan to display your garden art outdoors.
Creative Ways to Display Your Crystal Watering Can Garden Art
One of my favorite things about this DIY garden sculpture is how many different ways you can display it!
The combination of a rustic (or not so rustic!) watering can and sparkling crystal beads works beautifully with everything from colorful cottage gardens to simple backyard flower beds.
Here are a few of my favorite ideas for showing off your handmade garden art.
Add Sparkle to a Cottage or Country Garden
Hang your crystal watering can among roses, hydrangeas, lavender, or other cottage garden flowers.
The rustic watering can adds a beautiful country garden touch, while the sparkling crystals bring a little unexpected elegance to the display. This is especially pretty when the watering can is surrounded by lush greenery and colorful blooms.
Create a Whimsical Flower Bed Decoration
Place a shepherd's hook directly in a flower bed and position your watering can so the crystals appear to be pouring onto the plants below. It's such a cute way to add height, movement, and visual interest to a garden without taking up much space. You can even position the crystal waterfall over a favorite flowering plant to make it look as though you're watering it with sparkling droplets!
Decorate a Patio, Porch, or Container Garden
You don't need a large backyard to enjoy this project. A smaller crystal watering can would look lovely hanging near a patio container garden, on a covered porch, or beside a collection of potted flowers. Just choose a secure location where the crystals have room to hang freely.
Make a Beautiful Handmade Gift for a Gardener
If you're looking for a unique garden gift, this project is a wonderful choice! I made extra crystal watering cans to give as gifts, and I love that they're both decorative and personal. You can customize the watering can color, crystal length, and overall style to suit the recipient's garden. It's a lovely homemade gift idea for Mother's Day, birthdays, housewarmings, or anyone who enjoys beautiful garden decorations.
Turn an Old Watering Can Into Upcycled Garden Art
Have an old watering can that's seen better days? Instead of throwing it away, consider turning it into a sparkling garden ornament! A fresh coat of paint and a few strands of crystal garland can give an ordinary watering can a completely new purpose. It's a creative way to make unique garden decor while reusing something you already own.
Step 2: Plan Your Cascading Crystal Beads
Now comes the fun part — creating the sparkling crystal waterfall!
Lay out your crystal bead garlands and decide how long and full you want the strands to be.
Think about where you'll hang your finished watering can. Will it be suspended above a flower bed, tucked among your garden plants, or displayed on a shepherd's hook beside a garden path? The height of your display will help determine how long your crystal strands should be.
For a realistic pouring-water effect, I like to use several strands of crystal beads hanging together from the spout. The different facets catch the sunlight beautifully and create the appearance of shimmering water droplets.
If your crystal garland comes in one long piece, carefully separate it into shorter sections using your jewelry pliers. I prefer working with the single long garlands because they are easier to make the pieces the size you want.
If you've purchased shorter sections of crystal chain, you can connect or remove individual pieces until you get the lengths you want.
My tip: Before attaching anything, hold the crystal strands beneath the watering can's spout to see how they'll look. You can experiment with slightly different lengths to create a more natural, flowing-water effect.
Step 3: Protect Your Crystal Garland for Outdoor Display
Since this crystal watering can will be displayed in the garden, it's worth taking a few extra minutes to help protect the metal components from moisture.
Lay your crystal strands out on newspaper or another protected work surface.
If your crystal garland has metal connectors that aren't already corrosion-resistant, you can apply a light coating of a compatible clear protective spray to the metal components.
Be aware that some coatings may affect the clarity or sparkle of crystal beads, so test a small area first. You may prefer to protect only the metal connections rather than spraying the entire garland.
Allow everything to dry completely before assembling your garden decoration.
Why this matters: Outdoor moisture can eventually cause ordinary metal connectors and craft wire to rust or tarnish. Choosing corrosion-resistant materials from the beginning will help keep your crystal watering can looking beautiful longer.
For the best results, I recommend using crystal garlands with rust-resistant connectors whenever possible.
Tips for Keeping Your Crystal Watering Can Beautiful
Although this project is fairly simple, a little maintenance can help your handmade garden decoration stay beautiful. Choose quality outdoor materials. Durable watering cans, corrosion-resistant wire, and sturdy crystal connectors are good choices for outdoor displays.
Keep the crystals clean. Dust, pollen, and water spots can eventually dull their sparkle. Gently wipe the beads with a soft cloth as needed.
Watch for rust or tarnish. Check the wire connections occasionally and replace any pieces that begin to corrode or weaken.
Protect your garden art during severe weather. Strong winds, ice, and heavy snow can damage the hanging strands or their connections. I recommend bringing your watering can indoors during harsh winter weather.
Find the perfect sunny spot. The crystals look especially beautiful when they catch morning or late-afternoon sunlight. Try a few different locations to see where your watering can sparkles the most!
More DIY Beaded Suncatchers and Garden Decoration Ideas
Love adding a little sparkle to your home and garden? I have lots more DIY beading tutorials, handmade suncatchers, and creative garden art projects to share with you!
From beautiful crystal suncatchers and whimsical garden decorations to sparkling bead and wire crafts, you'll find plenty of fun, creative projects to inspire your next handmade creation.
Explore my collection of DIY beading and suncatcher tutorials for more step-by-step instructions, creative ideas, and beautiful projects you can make yourself!
Happy crafting — and happy gardening!

Step 4: Attach the Crystal Strands to Your Watering Can
Once your watering can and crystal strands are ready, it's time to put everything together!
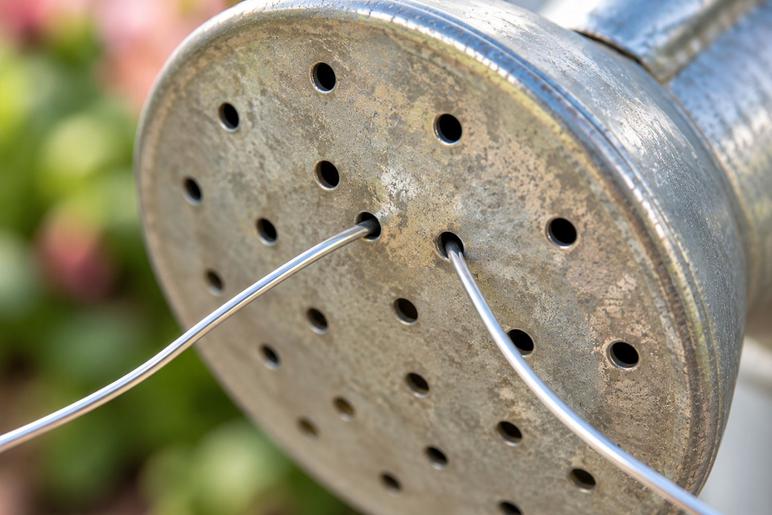
You'll be attaching the crystal garland through the small holes in the watering can's spout, allowing the beads to hang down like streams of sparkling water.
I recommend using a good-quality, non-tarnish craft wire. I like Artistic Wire's Non-Tarnish Silver-Plated wire for projects like this because it has a bright silver appearance that blends nicely with clear crystals.
Just remember that non-tarnish wire isn't necessarily rustproof, so choose a material suitable for your outdoor conditions, and consider using a sealing spray to help it last longer.
Here's how to attach your crystal strands:
Cut a short piece of craft wire and bend it into a U shape.
Carefully feed one end of the wire into a hole in the watering can's spout and bring it back out through a neighboring hole.
Twist the two wire ends together to create a secure loop.
Slip the metal loop at the end of your crystal garland onto the wire loop.
Tighten and secure the wire, tucking any sharp ends out of the way.
Repeat with the remaining crystal strands until you're happy with the fullness of your sparkling waterfall.
Make sure each strand is securely attached so it won't easily come loose in the wind.
Creative tip: You don't have to make every crystal strand exactly the same length! A few subtle variations can make your beaded watering can look more like water naturally flowing from the spout.
Step 5: Hang Your Sparkling Watering Can in the Garden
Your beautiful DIY crystal watering can garden art is finished!
Find a sunny spot in your garden where the crystal beads can catch the light, and hang your watering can from a sturdy shepherd's hook or decorative garden hanger.
I especially love how the clear crystals look when the sun shines through them. They sparkle against the greenery and flowers, making the whole display feel a little magical.
Make sure your hook is securely installed and can support the weight of your watering can and crystal strands, especially during windy weather.
Then sit back and enjoy your gorgeous new garden decoration!
And don't forget to really water your flowers. ;)